Enhancing OCR Accuracy in Python with OpenCV and PyTesseract
Summary
In this post, the use of Python-based tools such as OpenCV and PyTesseract for enhancing Optical Character Recognition (OCR) is explored, specifically targeting the issue of text recognition in images with overlay lines. The setup of a Python environment and the installation of essential libraries like numpy, matplotlib, and pillow are outlined as critical steps to support the main OCR functionalities.
Techniques for preprocessing images to improve the clarity of text, such as adjusting image contrast and reducing noise, are detailed. These preprocessing steps are emphasized as essential for preparing images for effective text recognition using pytesseract. Additional resources are provided, including links to a GitHub notebook with the complete code and references to a Stack Overflow discussion that enrich the tutorial.
Conclusion
It’s demonstrated that while text recognition in one unprocessed image was successfully achieved, the preprocessing of images consistently yielded better results. The importance of image processing techniques in enhancing the accuracy of OCR is underscored, with adjustments such as contrast enhancement and noise reduction proving particularly effective. These findings highlight the value of meticulous image preparation prior to OCR analysis, reinforcing the necessity for developers and researchers to integrate these techniques into their workflows for superior text recognition outcomes.
References
- GitHub Notebook File
- For stackoverflow issue Improving Text Recognition in the Presence of Overlay Lines
Installation
- It’s best to create a new environment based on OpenCV, which has some specific version dependencies.
conda create -n cv python opencv pytesseract numpy matplotlib pillowfor Anaconda.
- Required Packages
- Tesseract at UB Mannheim
- conda-forge: pytesseract
- GitHub: Pillow
- conda-forge: OpenCV
- Download OpenCV
- Make sure the system path has an entry for
\opencv\build\<x64 - architecture>\vc#\bin
- Make sure the system path has an entry for
Imports
1
2
3
4
5
6
from PIL import Image
import pytesseract
import cv2
import numpy as np
from matplotlib import pyplot as plt
from pathlib import Path
Package Versions
1
2
3
4
print(f"PIL: {Image.__version__}")
print(f"pytesseract: {pytesseract.__version__}")
print(f"opencv-python: {cv2.__version__}")
print(f"Numpy: {np.__version__}")
1
2
3
4
PIL: 10.3.0
pytesseract: 0.3.13
opencv-python: 4.9.0
Numpy: 1.26.4
Configuration
1
pytesseract.pytesseract.tesseract_cmd = "C:/Program Files/Tesseract-OCR/tesseract.exe"
1
data = Path.cwd().parent / 'data'
1
2
3
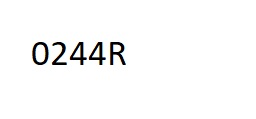
img_original = Image.open(data / '0244R.jpg')
img_new = Image.open(data / '0244R_clean.jpg')
imgs = [img_original, img_new]
OCR Without Image Processing
1
img_original

1
img_new
OCR Results With OCR Engine Mode and Page Segmentation Mode
--oemspecifies the OCR Engine Mode:- 0 = Original Tesseract only.
- 1 = Neural nets LSTM only.
- 2 = Tesseract + LSTM.
- 3 = Default, based on what is available.
--psmspecifies the Page Segmentation Mode:- 6 = Assume a single uniform block of text.
- There are various other options for
--psmwhich you can experiment with to see which one works best for your images.
Setting the configuration options results in mostly recognizing the obscured text.
1
2
3
4
5
# Example of setting OCR engine configuration options
custom_config = r'--oem 3 --psm 6'  # Example configuration options

for img in imgs:
    print(f'OCR Result: {pytesseract.image_to_string(img, config=custom_config)}\n')
1
2
3
4
OCR Result: 0244R_


OCR Result: 0244R
OCR Results Without OCR Engine Mode and Page Segmentation Mode
The following answer does not produce the correct result.
1
2
3
4
image = cv2.imread(str(data / '0244R.jpg'))
gray = cv2.cvtColor(image, cv2.COLOR_BGR2GRAY)
ret, threshold = cv2.threshold(gray,55, 255, cv2.THRESH_BINARY)
print(pytesseract.image_to_string(threshold))
1
G244R.
Incorporate Image Processing
Improve Accuracy of OCR using Image Preprocessing
Explanation:
- Binary Thresholding (Step 1):
- The input image (
img) is thresholded using a fixed threshold value of 88. - Pixels with intensity greater than or equal to 88 are set to 255 (white), and pixels below 88 are set to 0 (black).
- This step simplifies the image into a binary representation.
- The input image (
- Otsu’s Thresholding (Step 2):
- Otsu’s method automatically determines an optimal threshold value based on the image histogram.
- It aims to minimize the intra-class variance within the foreground (text) and background regions.
- The result (
th2) is a further refined binary image.
- Gaussian Blurring (Step 3):
- Gaussian blurring is applied to reduce noise and smooth the image.
- A 5x5 Gaussian kernel is used to convolve with the binary image (
th2). - The output (
blur) is a less noisy version of the binary image.
- Final Otsu’s Thresholding (Step 4):
- Another Otsu’s thresholding is applied to the blurred image (
blur). - This step fine-tunes the binary representation, emphasizing text regions while minimizing noise.
- The result (
th3) is the smoothed image.
- Another Otsu’s thresholding is applied to the blurred image (
The image_smoothen function combines these steps to enhance the clarity of text regions in the input image. Adjusting the threshold values and kernel size may further optimize the results based on specific use cases.
1
2
3
4
5
6
7
8
9
10
11
12
13
14
def image_smoothen(img):
    # Step 1: Apply binary thresholding to the input image
    ret1, th1 = cv2.threshold(img, 88, 255, cv2.THRESH_BINARY)

    # Step 2: Apply Otsu's thresholding to further enhance the binary image
    ret2, th2 = cv2.threshold(th1, 0, 255, cv2.THRESH_BINARY + cv2.THRESH_OTSU)

    # Step 3: Perform Gaussian blurring to reduce noise
    blur = cv2.GaussianBlur(th2, (5, 5), 0)

    # Step 4: Apply another Otsu's thresholding to obtain the final smoothed image
    ret3, th3 = cv2.threshold(blur, 0, 255, cv2.THRESH_BINARY + cv2.THRESH_OTSU)

    return th3
Explanation:
Reading the Image: The function reads the image specified by the
file_nameparameter in grayscale mode (0). Grayscale images have a single channel representing intensity (brightness) rather than color.Adaptive Thresholding: Adaptive thresholding is applied to the grayscale image (
img). It dynamically adjusts the threshold value based on local pixel neighborhoods. This helps filter out noise and enhance text regions.Morphological Opening: Morphological opening is performed using the
kernel. Opening removes small noise regions (small white spots) by eroding and then dilating the image. It helps clean up the text regions.Morphological Closing: Morphological closing is also performed using the same
kernel. Closing fills gaps in text regions (small black holes) by dilating and then eroding the image.Custom Smoothening: The
image_smoothenfunction (not shown here) further smoothes the image. This step likely involves additional filtering or blurring techniques to improve text clarity.Bitwise OR Operation: The final result is obtained by combining the smoothened image (
img) with the closing result using a bitwise OR operation. This ensures that both text regions and gaps are preserved.
Remember to replace the image_smoothen function with its actual implementation, as it’s not defined in the provided code snippet. Additionally, consider adding comments within the image_smoothen function to explain its purpose and any specific techniques used.
1
2
3
4
5
6
7
8
9
10
11
12
13
14
15
16
17
18
19
20
21
22
23
def remove_noise_and_smooth(file_name):
    # Read the image from the specified file path in grayscale mode
    img = cv2.imread(file_name, 0)

    # Apply adaptive thresholding to filter out noise and enhance text visibility
    filtered = cv2.adaptiveThreshold(img, 255, cv2.ADAPTIVE_THRESH_MEAN_C, cv2.THRESH_BINARY, 9, 41)

    # Define a kernel for morphological operations (erosion and dilation)
    kernel = np.ones((1, 1), np.uint8)

    # Perform morphological opening to remove small noise regions
    opening = cv2.morphologyEx(filtered, cv2.MORPH_OPEN, kernel)

    # Perform morphological closing to fill gaps in text regions
    closing = cv2.morphologyEx(opening, cv2.MORPH_CLOSE, kernel)

    # Further smoothen the image using a custom function (image_smoothen)
    img = image_smoothen(img)

    # Combine the smoothened image with the closing result using bitwise OR
    or_image = cv2.bitwise_or(img, closing)

    return or_image
Usage
These options are not used, because they do not result in successful OCR
1
not_used_thresh = [cv2.THRESH_BINARY_INV, cv2.THRESH_TOZERO_INV]
The function cv2.threshold() is used to apply a threshold to an image. Here’s an explanation of each parameter:
img: This is the input image, which should be a single-channel grayscale image.127: This is the threshold value. Pixels with intensity values less than or equal to this threshold are set to 0 (black), and pixels with intensity values greater than this threshold are set to 255 (white).255: This is the maximum intensity value that pixels can be set to after applying the threshold.item: This parameter specifies the type of thresholding to apply. It can take different values likecv2.THRESH_BINARY,cv2.THRESH_TRUNC, orcv2.THRESH_TOZERO, which determine how the thresholding operation is performed.
In the given context, item is a variable representing different thresholding techniques, and cv2.threshold() is being called with this variable to apply various thresholding techniques to the input image img.
1
2
3
4
5
6
7
8
9
10
11
12
13
14
15
16
17
18
19
20
21
22
23
24
25
26
27
28
29
# List of thresholding techniques
cv2_thresh_list = [cv2.THRESH_BINARY, cv2.THRESH_TRUNC, cv2.THRESH_TOZERO]

# Custom configuration for Tesseract OCR
custom_config = r'--oem 3 --psm 6'

# Path to the image file
data = Path.cwd().parent / 'data'
fn = str(data / '0244R.jpg')

# Define image types
img_types = {'Preprocessed Image': remove_noise_and_smooth(fn),
             'Unprocessed Image': cv2.imread(fn, 0)}

# Process each image type
for img_type, img in img_types.items():
    print(img_type)
    for item in cv2_thresh_list:
        print(f'Thresh: {item}')
        _, thresh = cv2.threshold(img, 127, 255, item)
        plt.imshow(thresh, 'gray')
        f_name = f'{img_type}_{item}.jpg'
        plt.savefig(f_name, bbox_inches='tight')
        plt.show()

        # Perform OCR on the thresholded image
        ocr_result = pytesseract.image_to_string(thresh, config=custom_config)
        print(f'OCR Result: {ocr_result}\n')
        plt.close()
Results
1
2
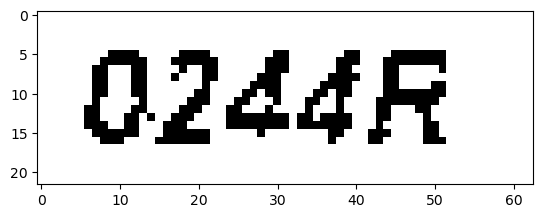
Preprocessed Image
Thresh: 0
1
2
3
4
OCR Result: 0244R


Thresh: 2

1
2
3
4
OCR Result: 0244R


Thresh: 3

1
2
3
4
5
OCR Result: 0244R
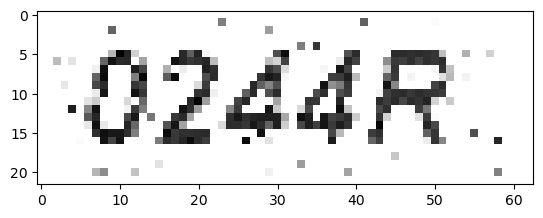
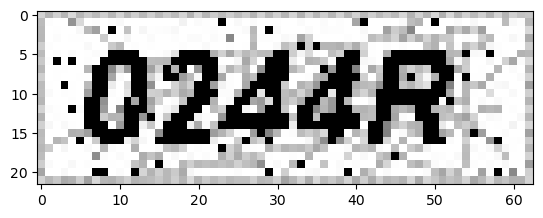
Unprocessed Image
Thresh: 0

1
2
3
4
OCR Result: 0244R


Thresh: 2
1
2
3
4
OCR Result: 0244R.


Thresh: 3
1
OCR Result: 0244.